Refreshing the S14 Digital Climate Control
The S14 Digital Climate control, is definitely a cool piece to have if you have a non gutted s-chassis and didn't decide to run gauges in your center vents like most people did in the 90's and early 20000's.
I think one of the biggest gripes about this piece is that it does not match the color of the center vent panel at all, it's a completely different shade of gray. I am not sure why the manufacturer Zexel did this. But I tried various things to try and spruce up my unit and I think it came out pretty good. Just came at a cost of a lot of trial and error.
It's mentioned in the Climate Control How To but this is what I did to re-seat the buttons on the unit as it's 25 year old plastic and they will break.
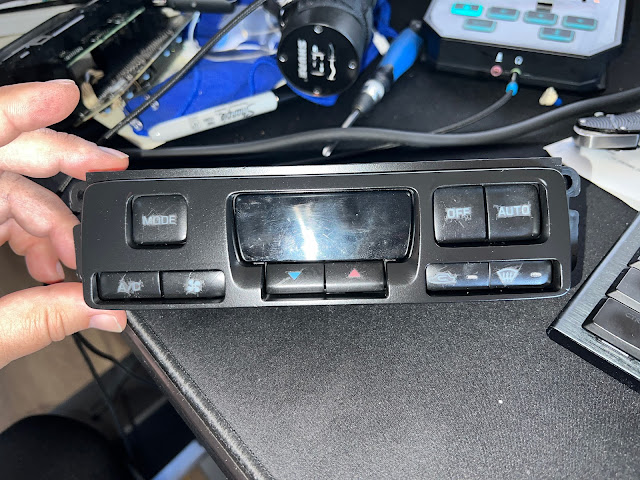
First mistake I made was trying to mask the buttons with painters tape and taking an xacto knife trying to mask the icons. I ended up gouging all of the buttons, This ultimately caused me to buy a second unit for 50 bucks on ebay to have as parts.
Soooooo that sucked, I contemplated having stickers made to put over the buttons. But because it's a one off job and my buddy was honest and said they probably wont be great but it's doable. I figured since we've already got a spare unit, lets see how far we can abuse my original one.
At least I got to paint the surround and that came out pretty good, but it really highlighted how shitty the buttons looked.
My next bright idea was to try and spray the paint into a dish and try to paint it on with a brush... That went horribly lmao.
 |
| the finished one is on the bottom here |
 |
| this is the stock gray against the center vent panel. Almost has a hint of brown in it. |
 |
| here is the final product. |
I would've liked the panel and the buttons texture to match, but I guess with the lcd screen it kinda goes with the buttons being darker and more of a shiny plastic while the surround is more in line with the color of the center vent panel.
I dig it, most people won't even notice something like this let alone the fact the digital climate control isn't an oem part in the US.
It's more of a IYKYK mod.


